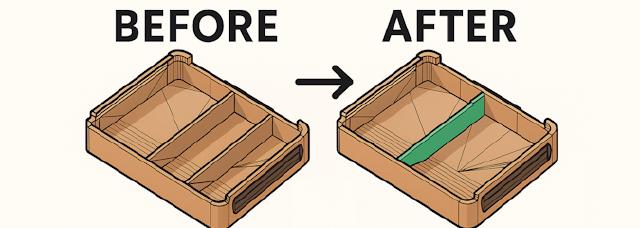
3D-models editing
While there are tons of great 3D models available on MakerWorld, Printables, or Thingiverse, sometimes I need to edit them “just a bit.” TinkerCAD is often the first tool people suggest - and for good reason. It’s easy to use, but it has a fundamental limitation: you can’t truly edit an existing model. You can only add or subtract shapes. Surprisingly, this can take you quite far - for example, many board game organizers can be made simply by subtracting compartments from a base box (that’s how I designed my organizers for Citadels and Machi Koro).
But what if you need something more complex than just adding or removing simple shapes?
More advanced editing
That’s what I just stumbled upon today when printing wonderfully designed trays for Quacks of Quedlinburg (kudos to the original author!). There was a tray with no dividers (for single-value tokens) and a tray with two dividers (for tokens with three values). However I needed a tray with just one divider.
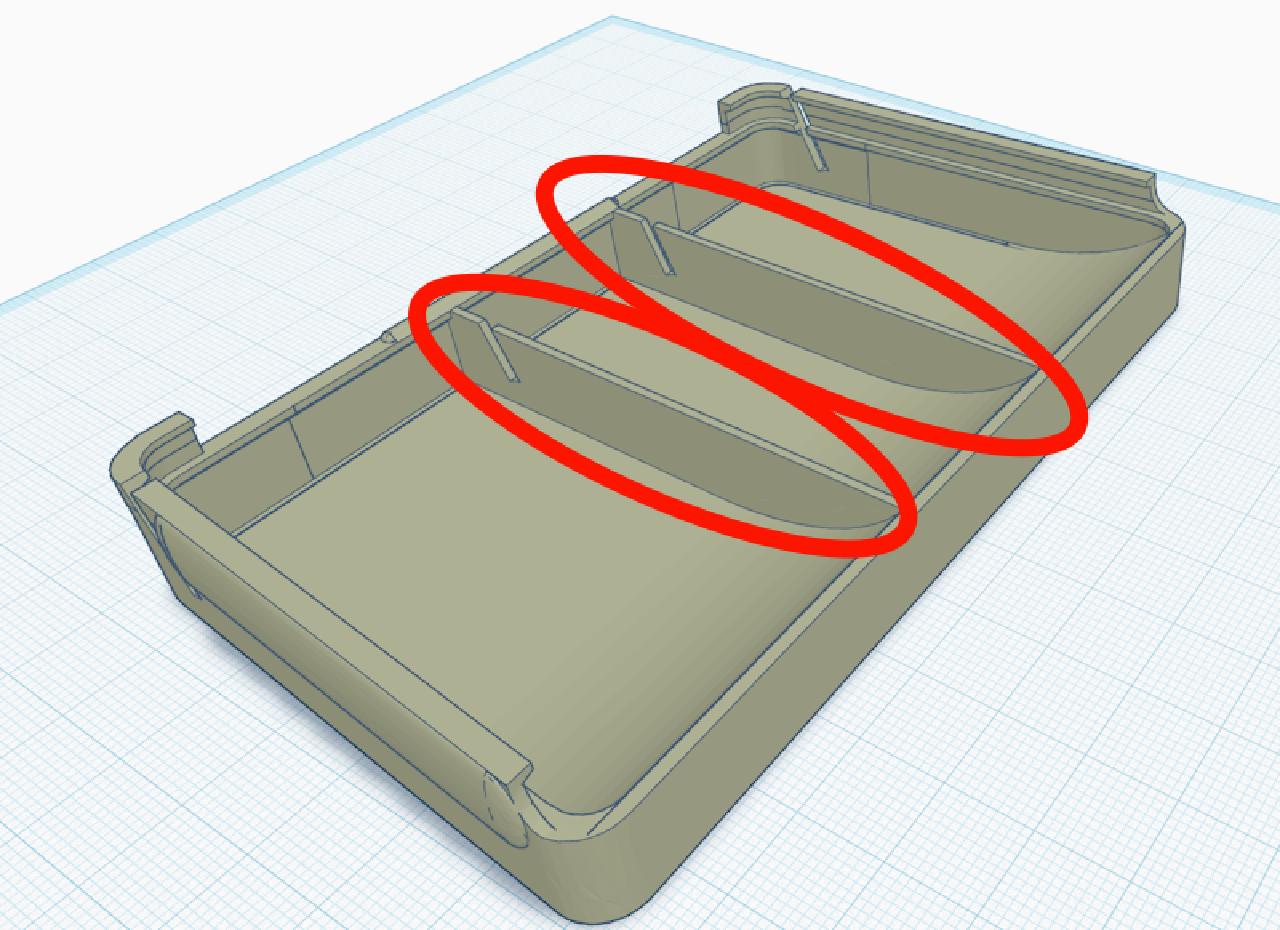
Sounds simple, right? "Magic wand" -> select divider -> move/remove - sounds straightforward. And apparently this is
exactly the type of problem TinkerCAD is not capable of solving. So we need more advanced editor. I took Fusion, and the
rest of the post will be about it.
Autodesk Fusion
Fusion is one of the most popular advanced 3D-editors nowadays, and it even has free license for personal use! So no
need to go to torrents, instead just register and download it from the official website. I’ll skip the boring set up part, I hope everyone manages to open an .STL file and let’s jump directly to it.
As soon as you open the model, it will be just a single solid blob (“body”). Unfortunately for us, there is no “Magic wand” selection in Fusion, but there is at least some way we can follow. After a few tries, I came to the following workflow:
Split to “Face Groups” -> split to multiple objects -> combine relevant pieces to one object -> combine the rest back.
It might not be the most efficient or elegant way, but this worked and was easy enough for me as a newbie in 3D modelling. Let’s go step by step with examples:
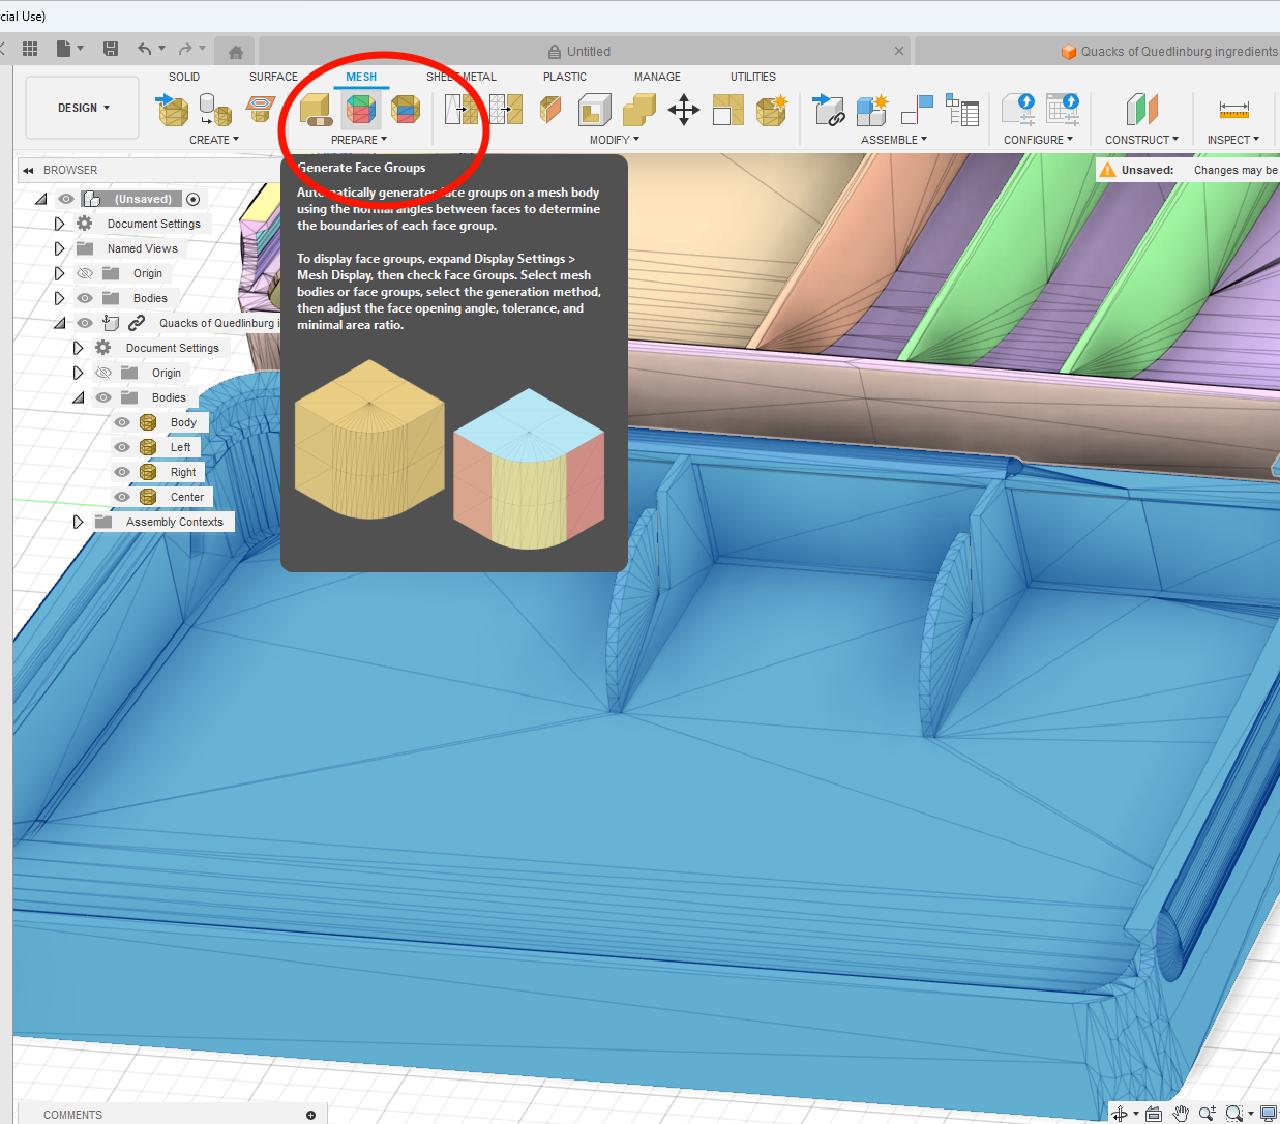
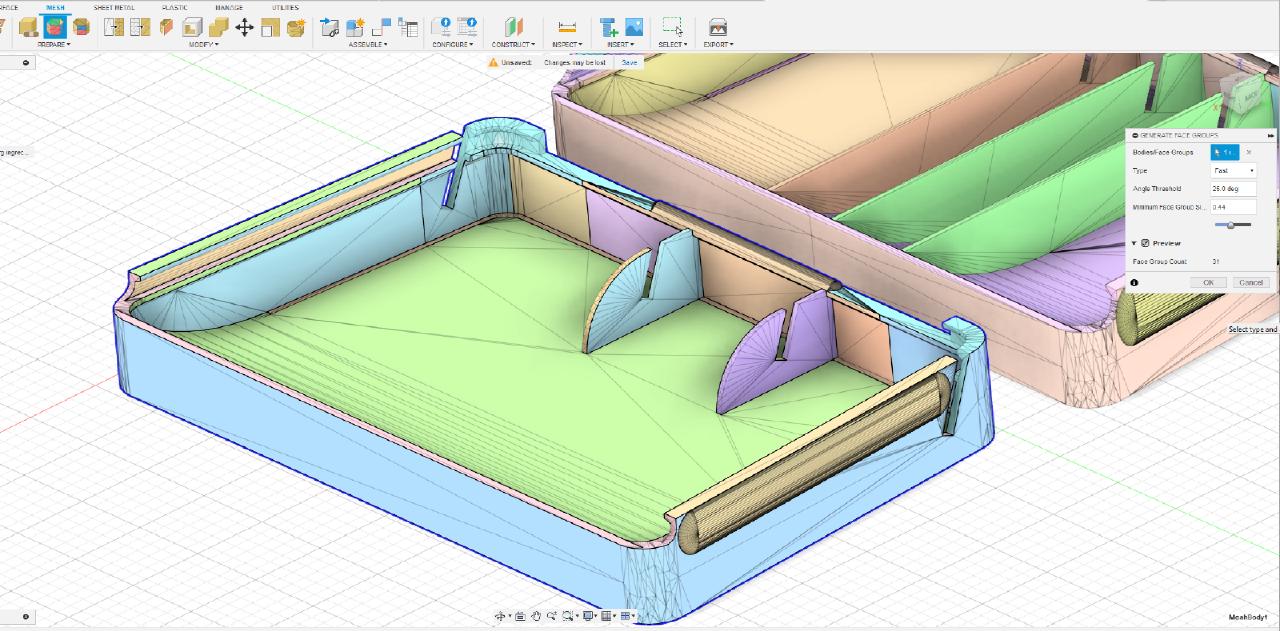
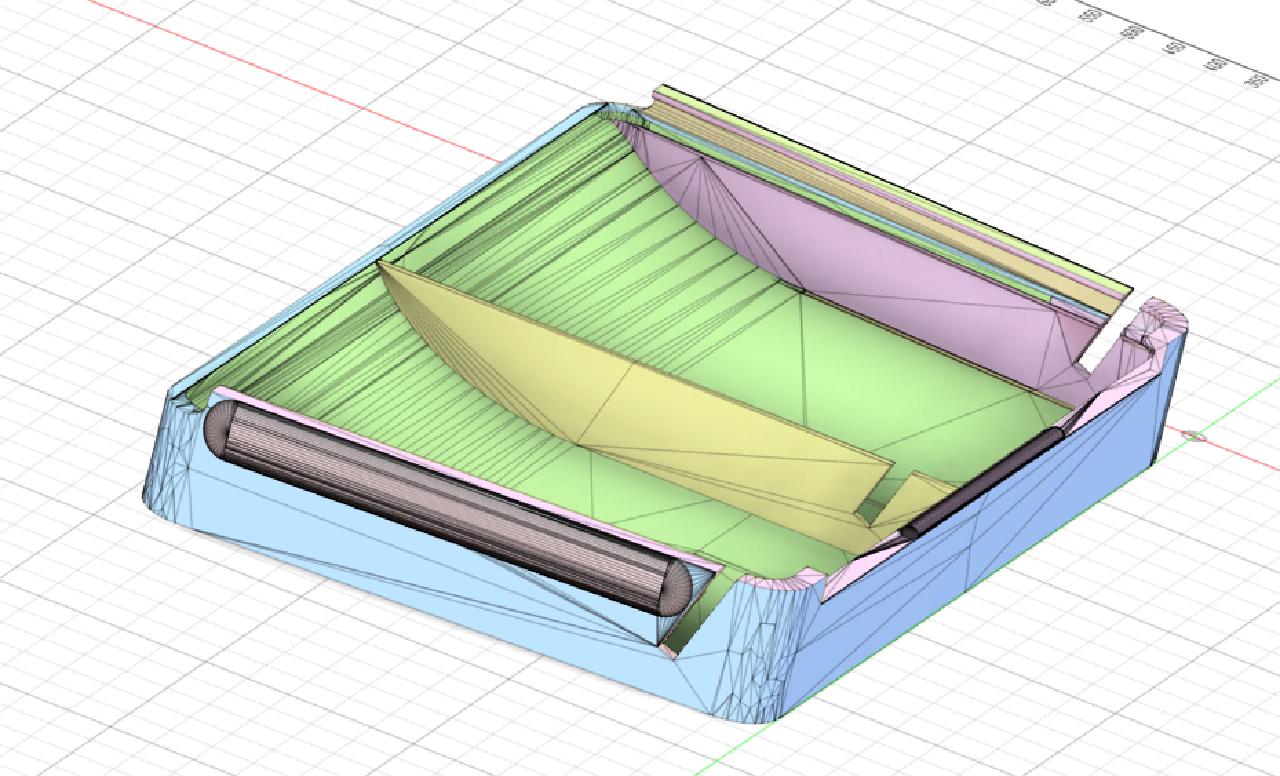
First of all, switch to Mesh tab. I don’t know why, but that’s where we’ll do the rest of everything. Then select your model and head to “Prepare”->“Generate Face Groups”. This works very similar to “Magic wand”, you can fine-tune the sensitivity, check preview and make sure different sides/parts of your object will be different “Face groups”.
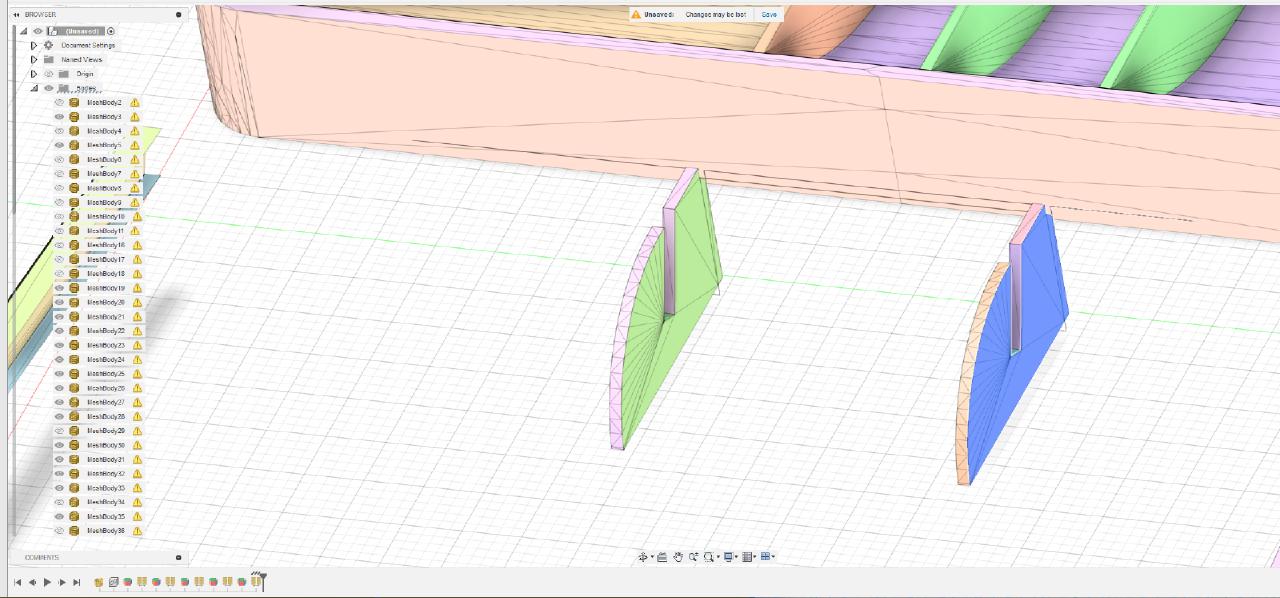
Now we are able to actually separate the model to pieces! In order to do this, go to Modify -> Separate, and this will split the whole model to all Face Groups we have generated on the previous step. That’s the most important step, if you skip it, you won’t be able to work with parts of the model!
Then comes the boring part - out of all (potentially, hundreds!) of Face Groups the tool has generated, we need to select only the ones actually composing our part we want to modify. The easiest way I found - hide all other Face groups step by step (select - Hide, you can select multiple at once by drawing a rectangle with a mouse).
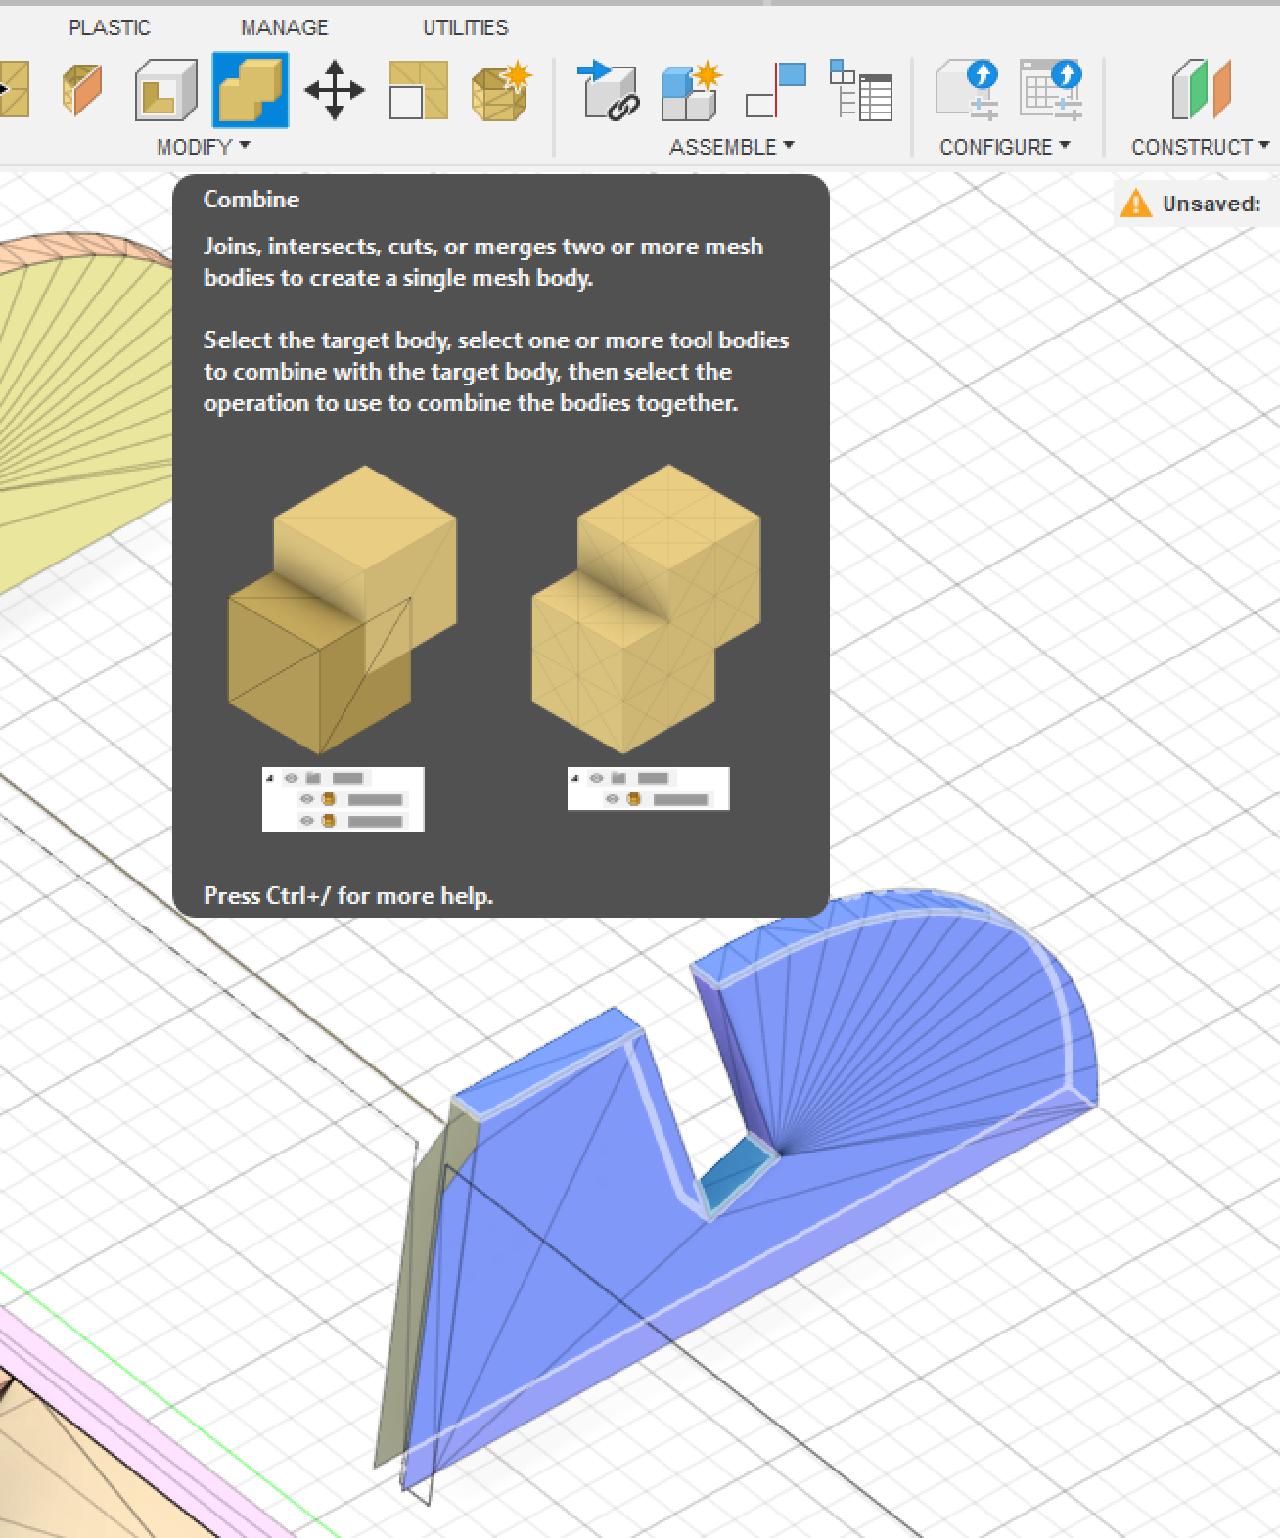
Now we have only our part visible, but there is a problem - it still consists of multiple “Mesh Bodies”. We need to merge it back to one object. Fortunately, it’s simple - select all small pieces and click “Combine”. Don’t forget some small pieces in gaps, you might want to rotate the model a lot to see that everything is selected. Optionally, you can also combine Face groups, because for some reason they’re still separated, but that’s not required.
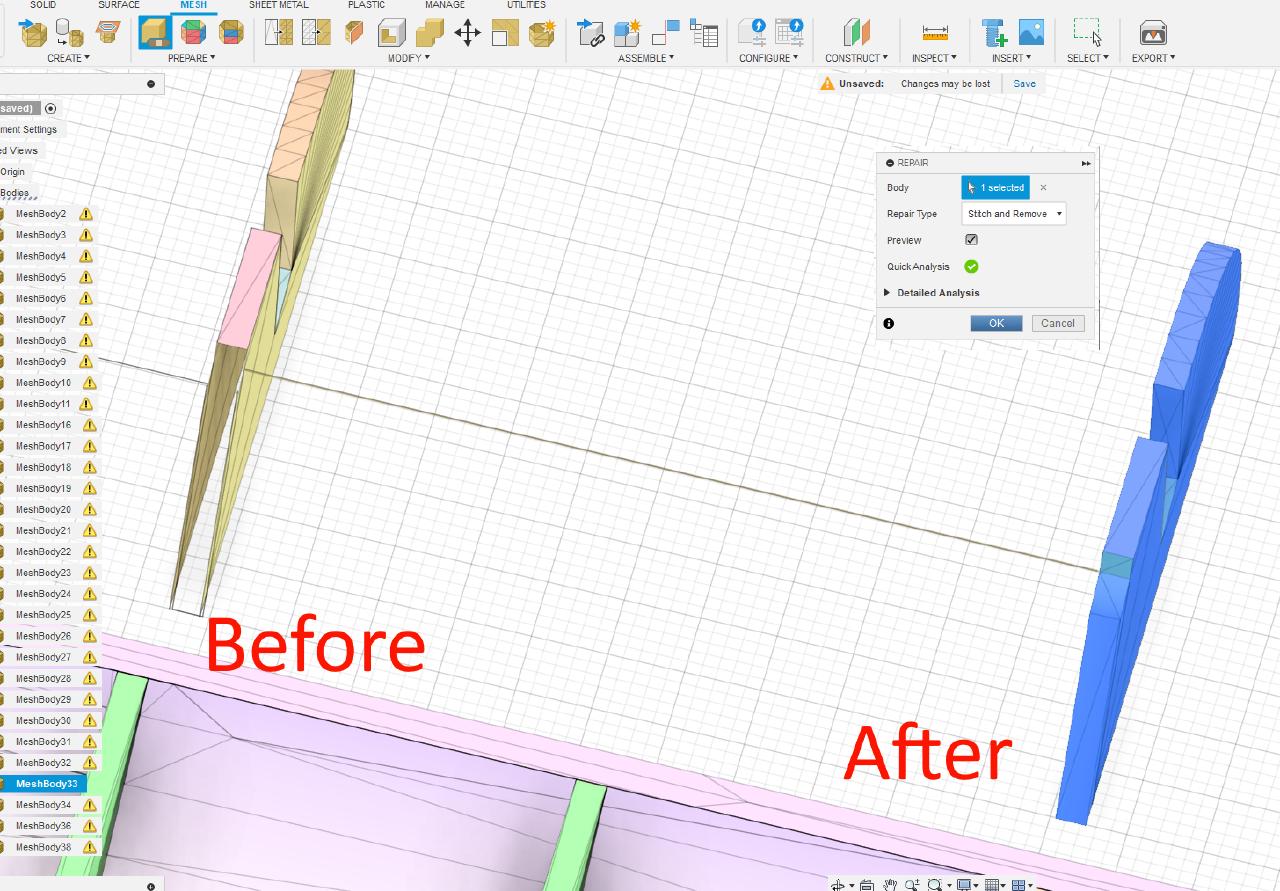
Even if you have selected everything, the model might not be completely “closed” yet. Luckily, there is magic “Repair” button which is able to fill the gaps and make our piece a proper-volume 3D-model.
At this point, if you just needed the part, you can already export just it as STL or 3MF and either print directly or do something else with it. But let me show the extra step to come to a proper 3MF with different objects.
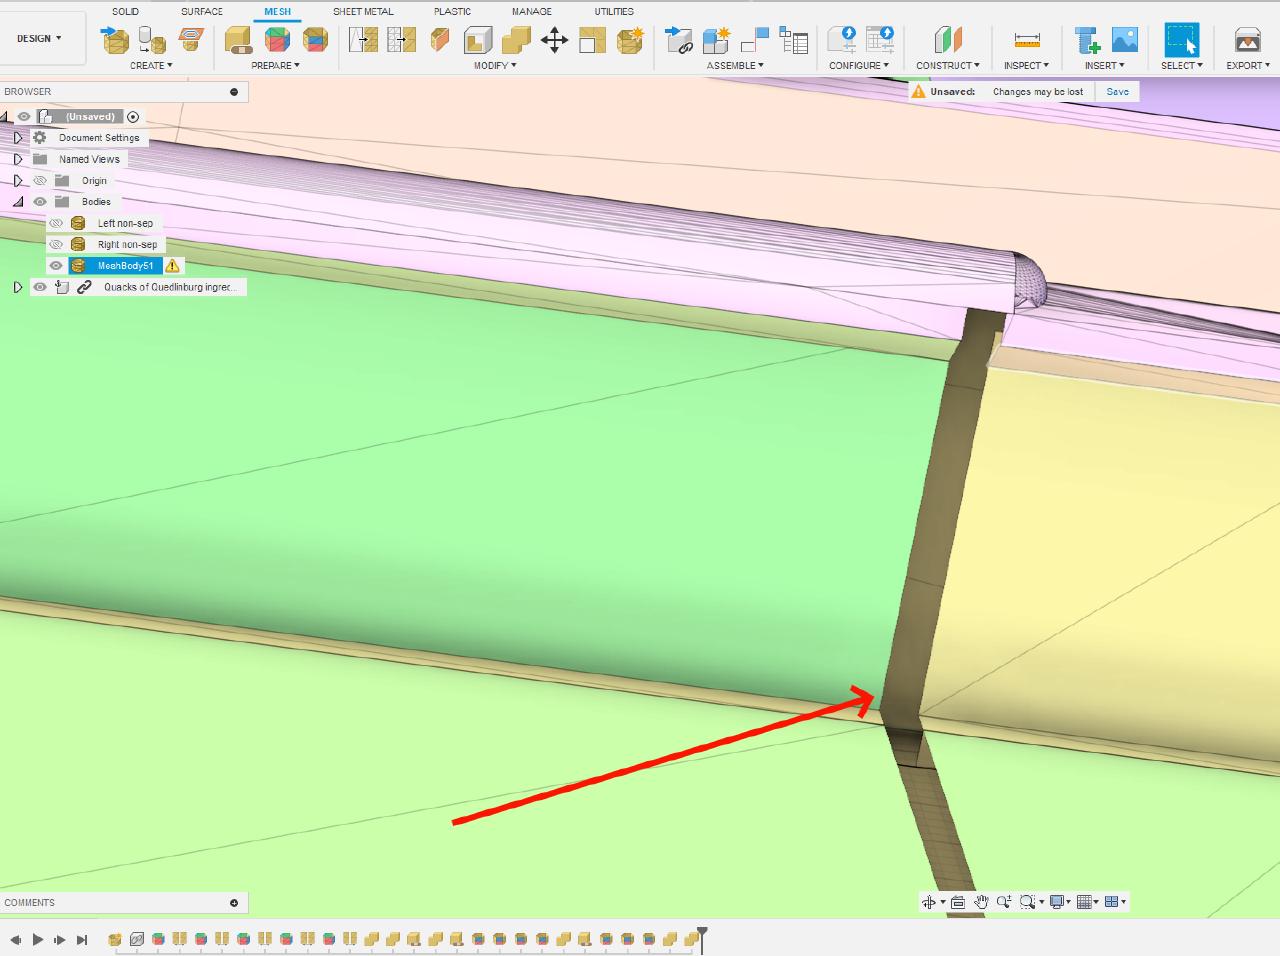
We have completed working on our piece, so we can “unhide” the rest of the original model. And if you hide just our newly separated piece, you might notice some gaps left in the areas where main model and our piece were intersecting. Let’s fix it the same way we fixed our piece! Firstly, of course, select all remaining “Mesh Bodies” and Combine them. This will lead to “unclosed mesh” which can be Repaired and this will automatically close the gaps.
If you did everything correctly, now you should only have a couple of Mesh Bodies under “Bodies” section: base model and the piece(-s) you wanted to separate. Now it’s finally possible to freely move/rearrange them. As you remember, in my case I wanted to only have one divider in the middle -> so I removed one divider and moved second one to the middle.
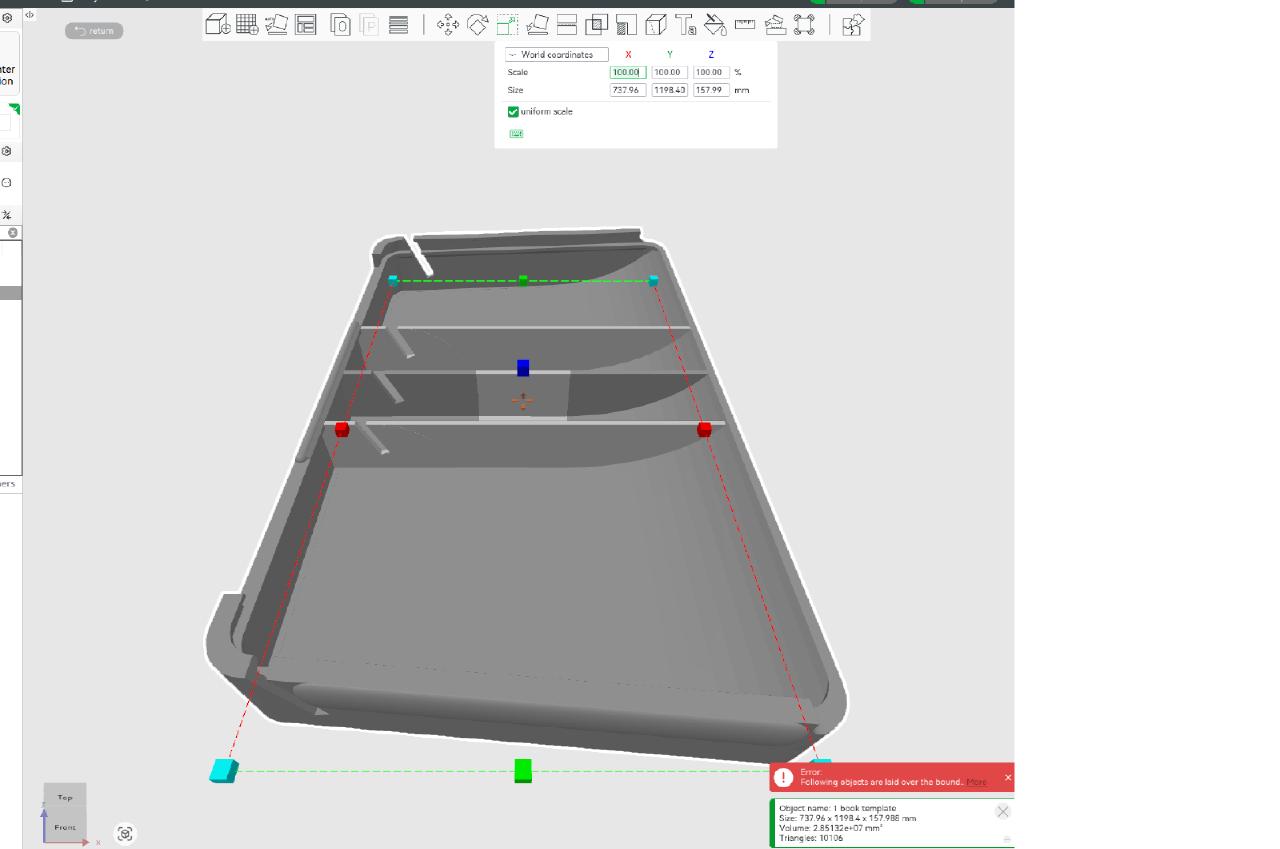
When model is exported in .3MF (more modern format which might contain multiple objects at once) and opened in Bambu Studio I noticed a bug - the sizes were all 10x off. So scale everything down from 100% to 10% to get original sizes.
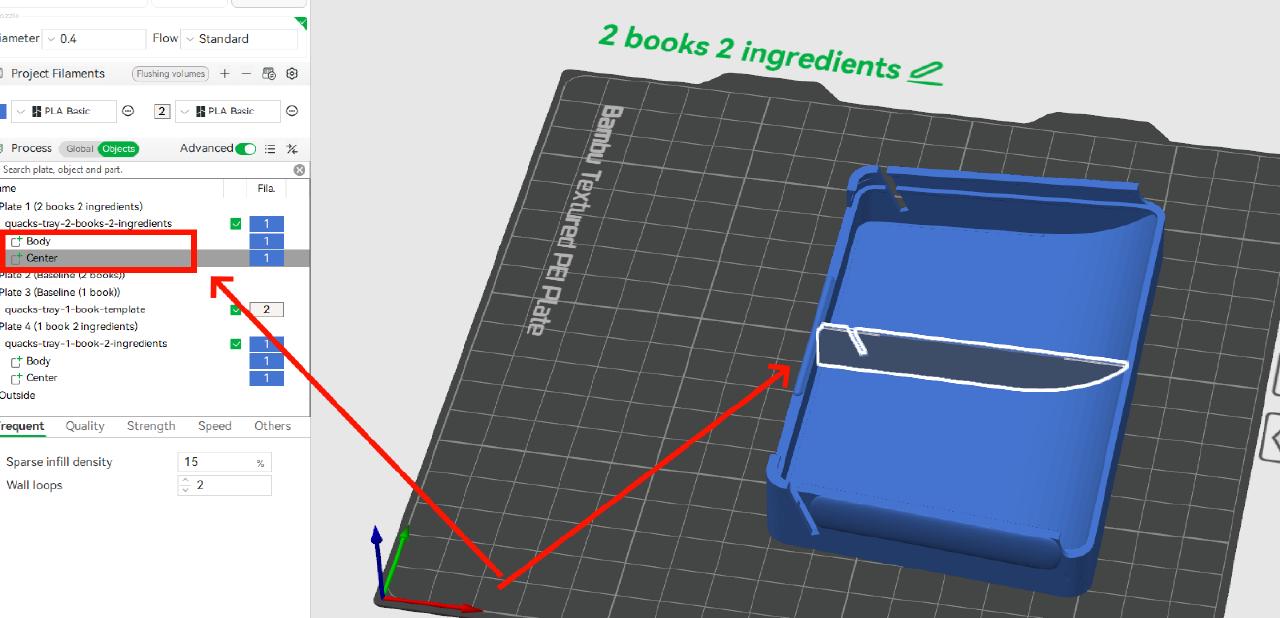
Summary
With just a few steps in Autodesk Fusion, you can separate, modify, and rebuild even the most complex 3D models. Next time you find a great design that’s “almost” what you need, you’ll know exactly how to tweak it for your project. Stay tuned!
